
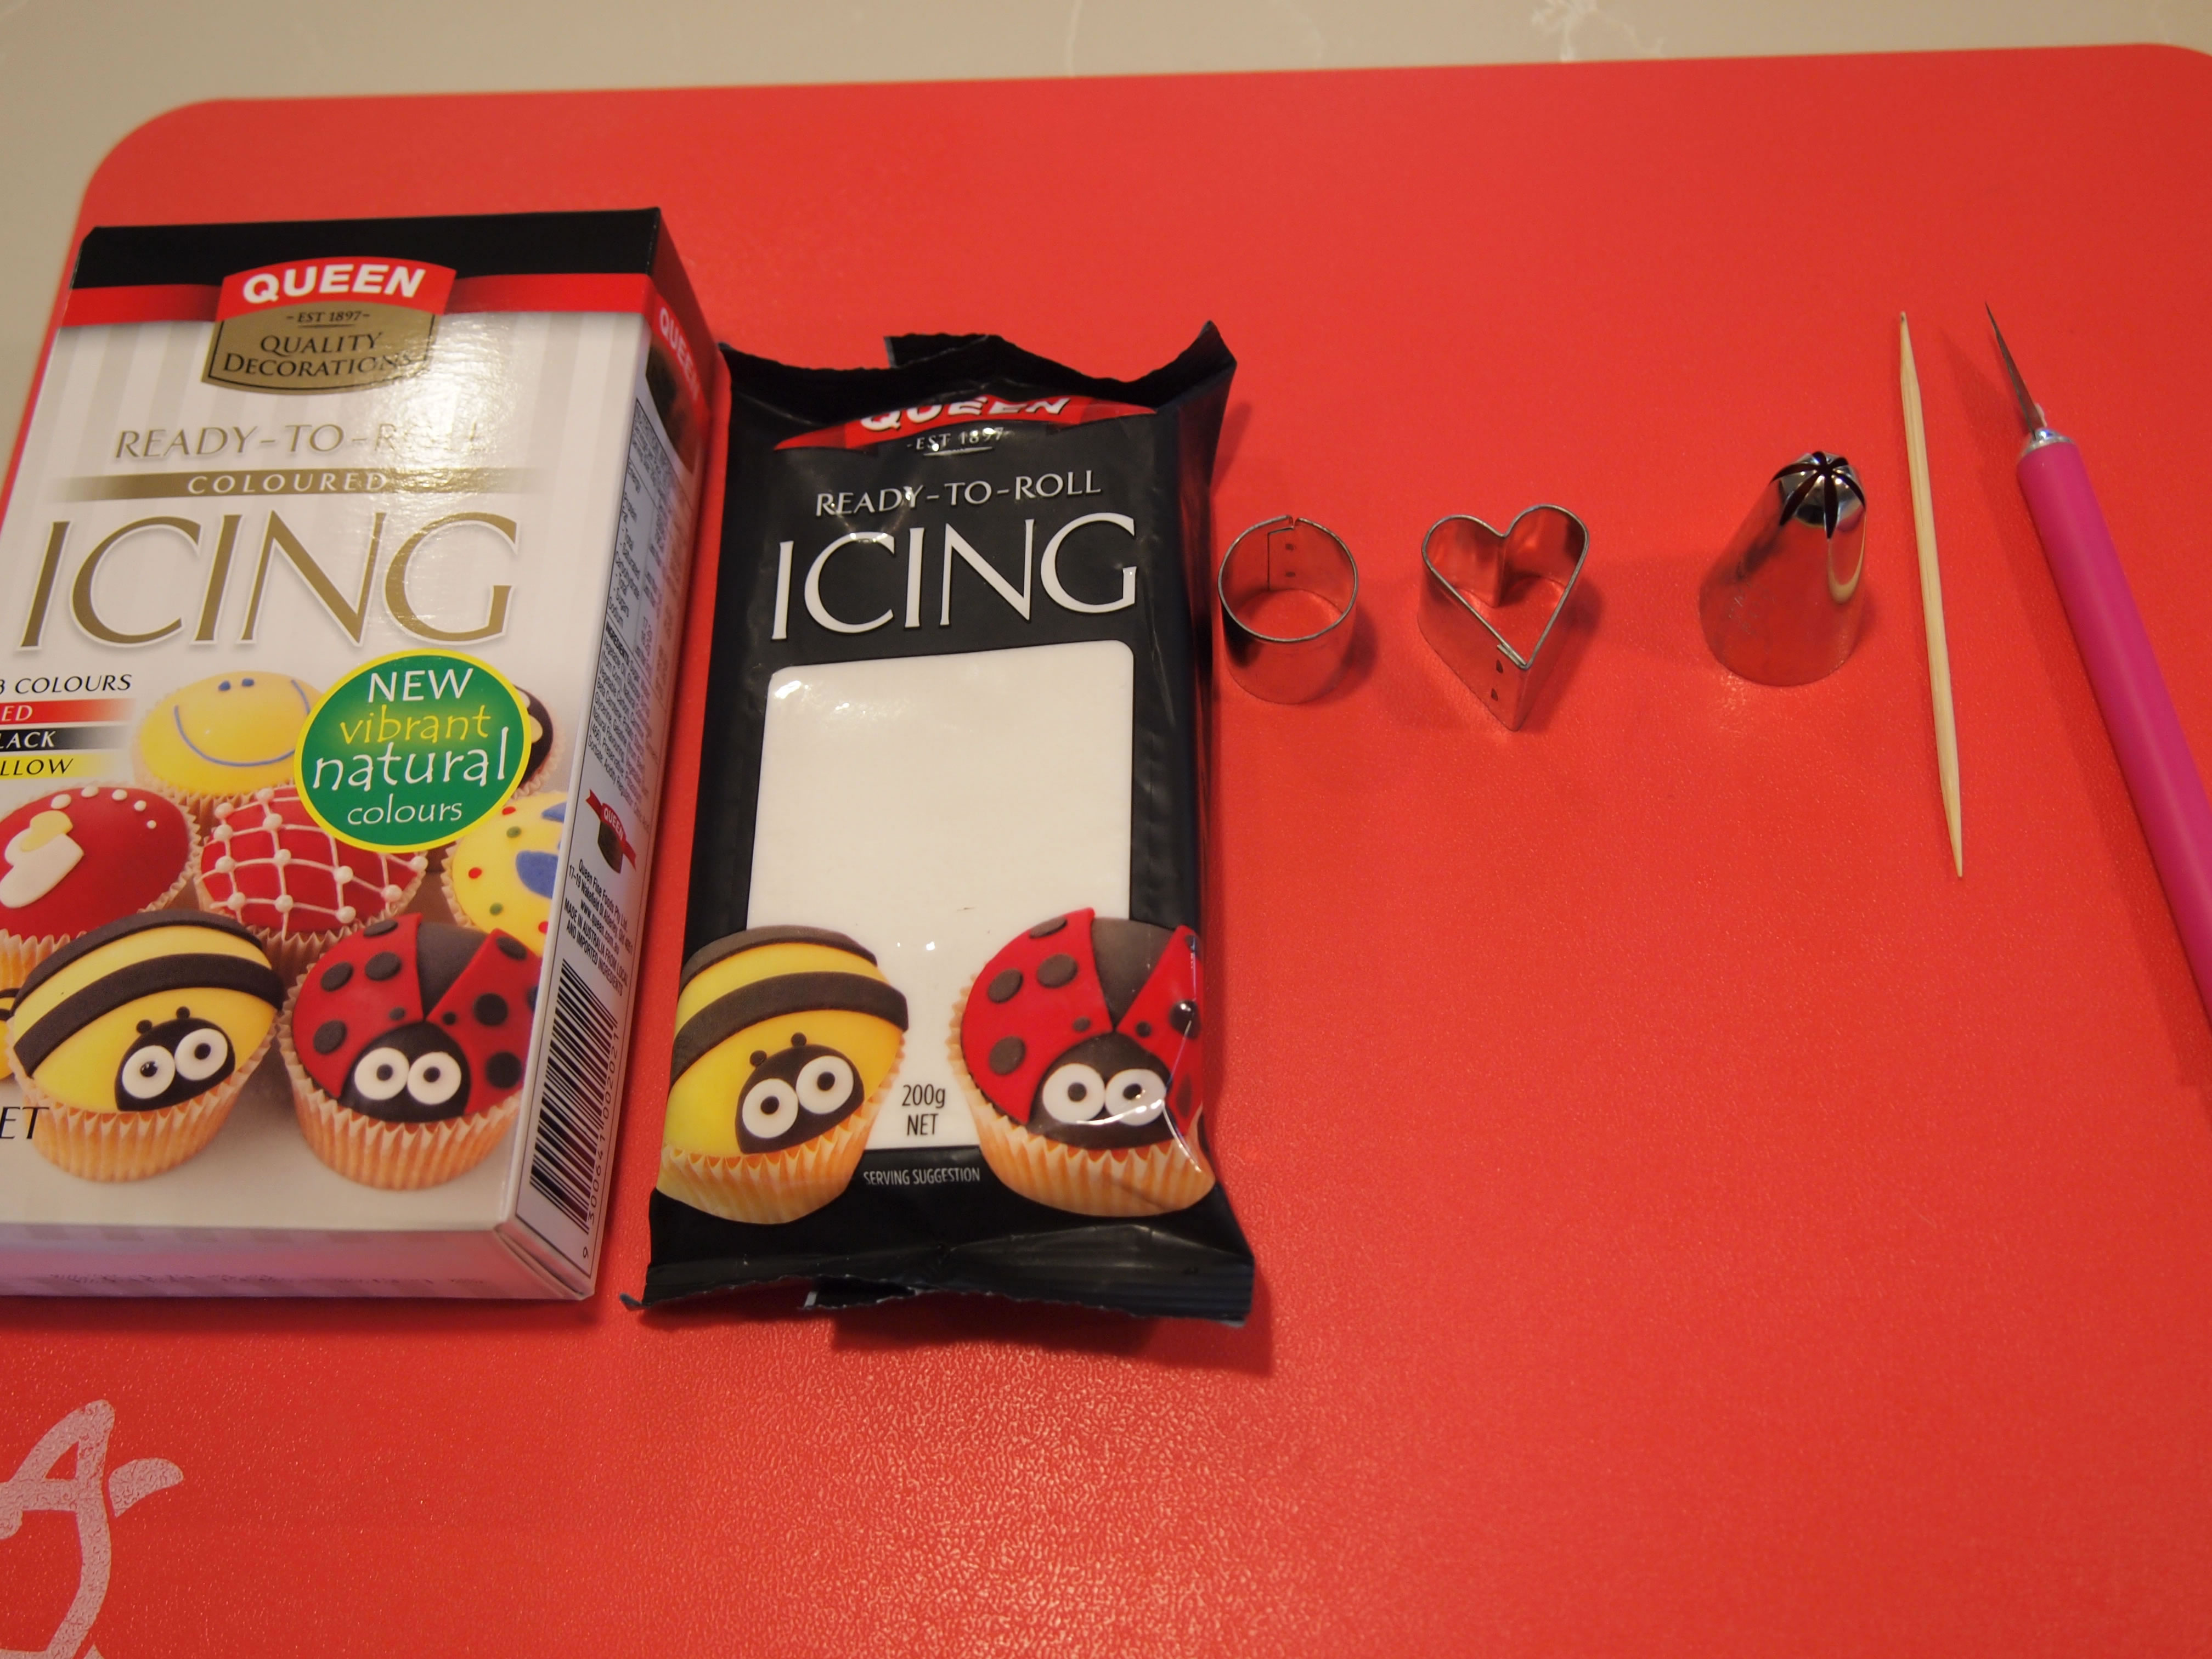
Tools & Ingredients
- 1 packet Dr. Oetker Ready to Roll Icing Coloured (Red, Yellow, Black)
- 1 packet Dr.Oetker Ready to Roll Icing White
- 1 Toothpick
- Circle cutter
- Rolling pin
- Icing sugar
- Vegetable shortening or water
Method
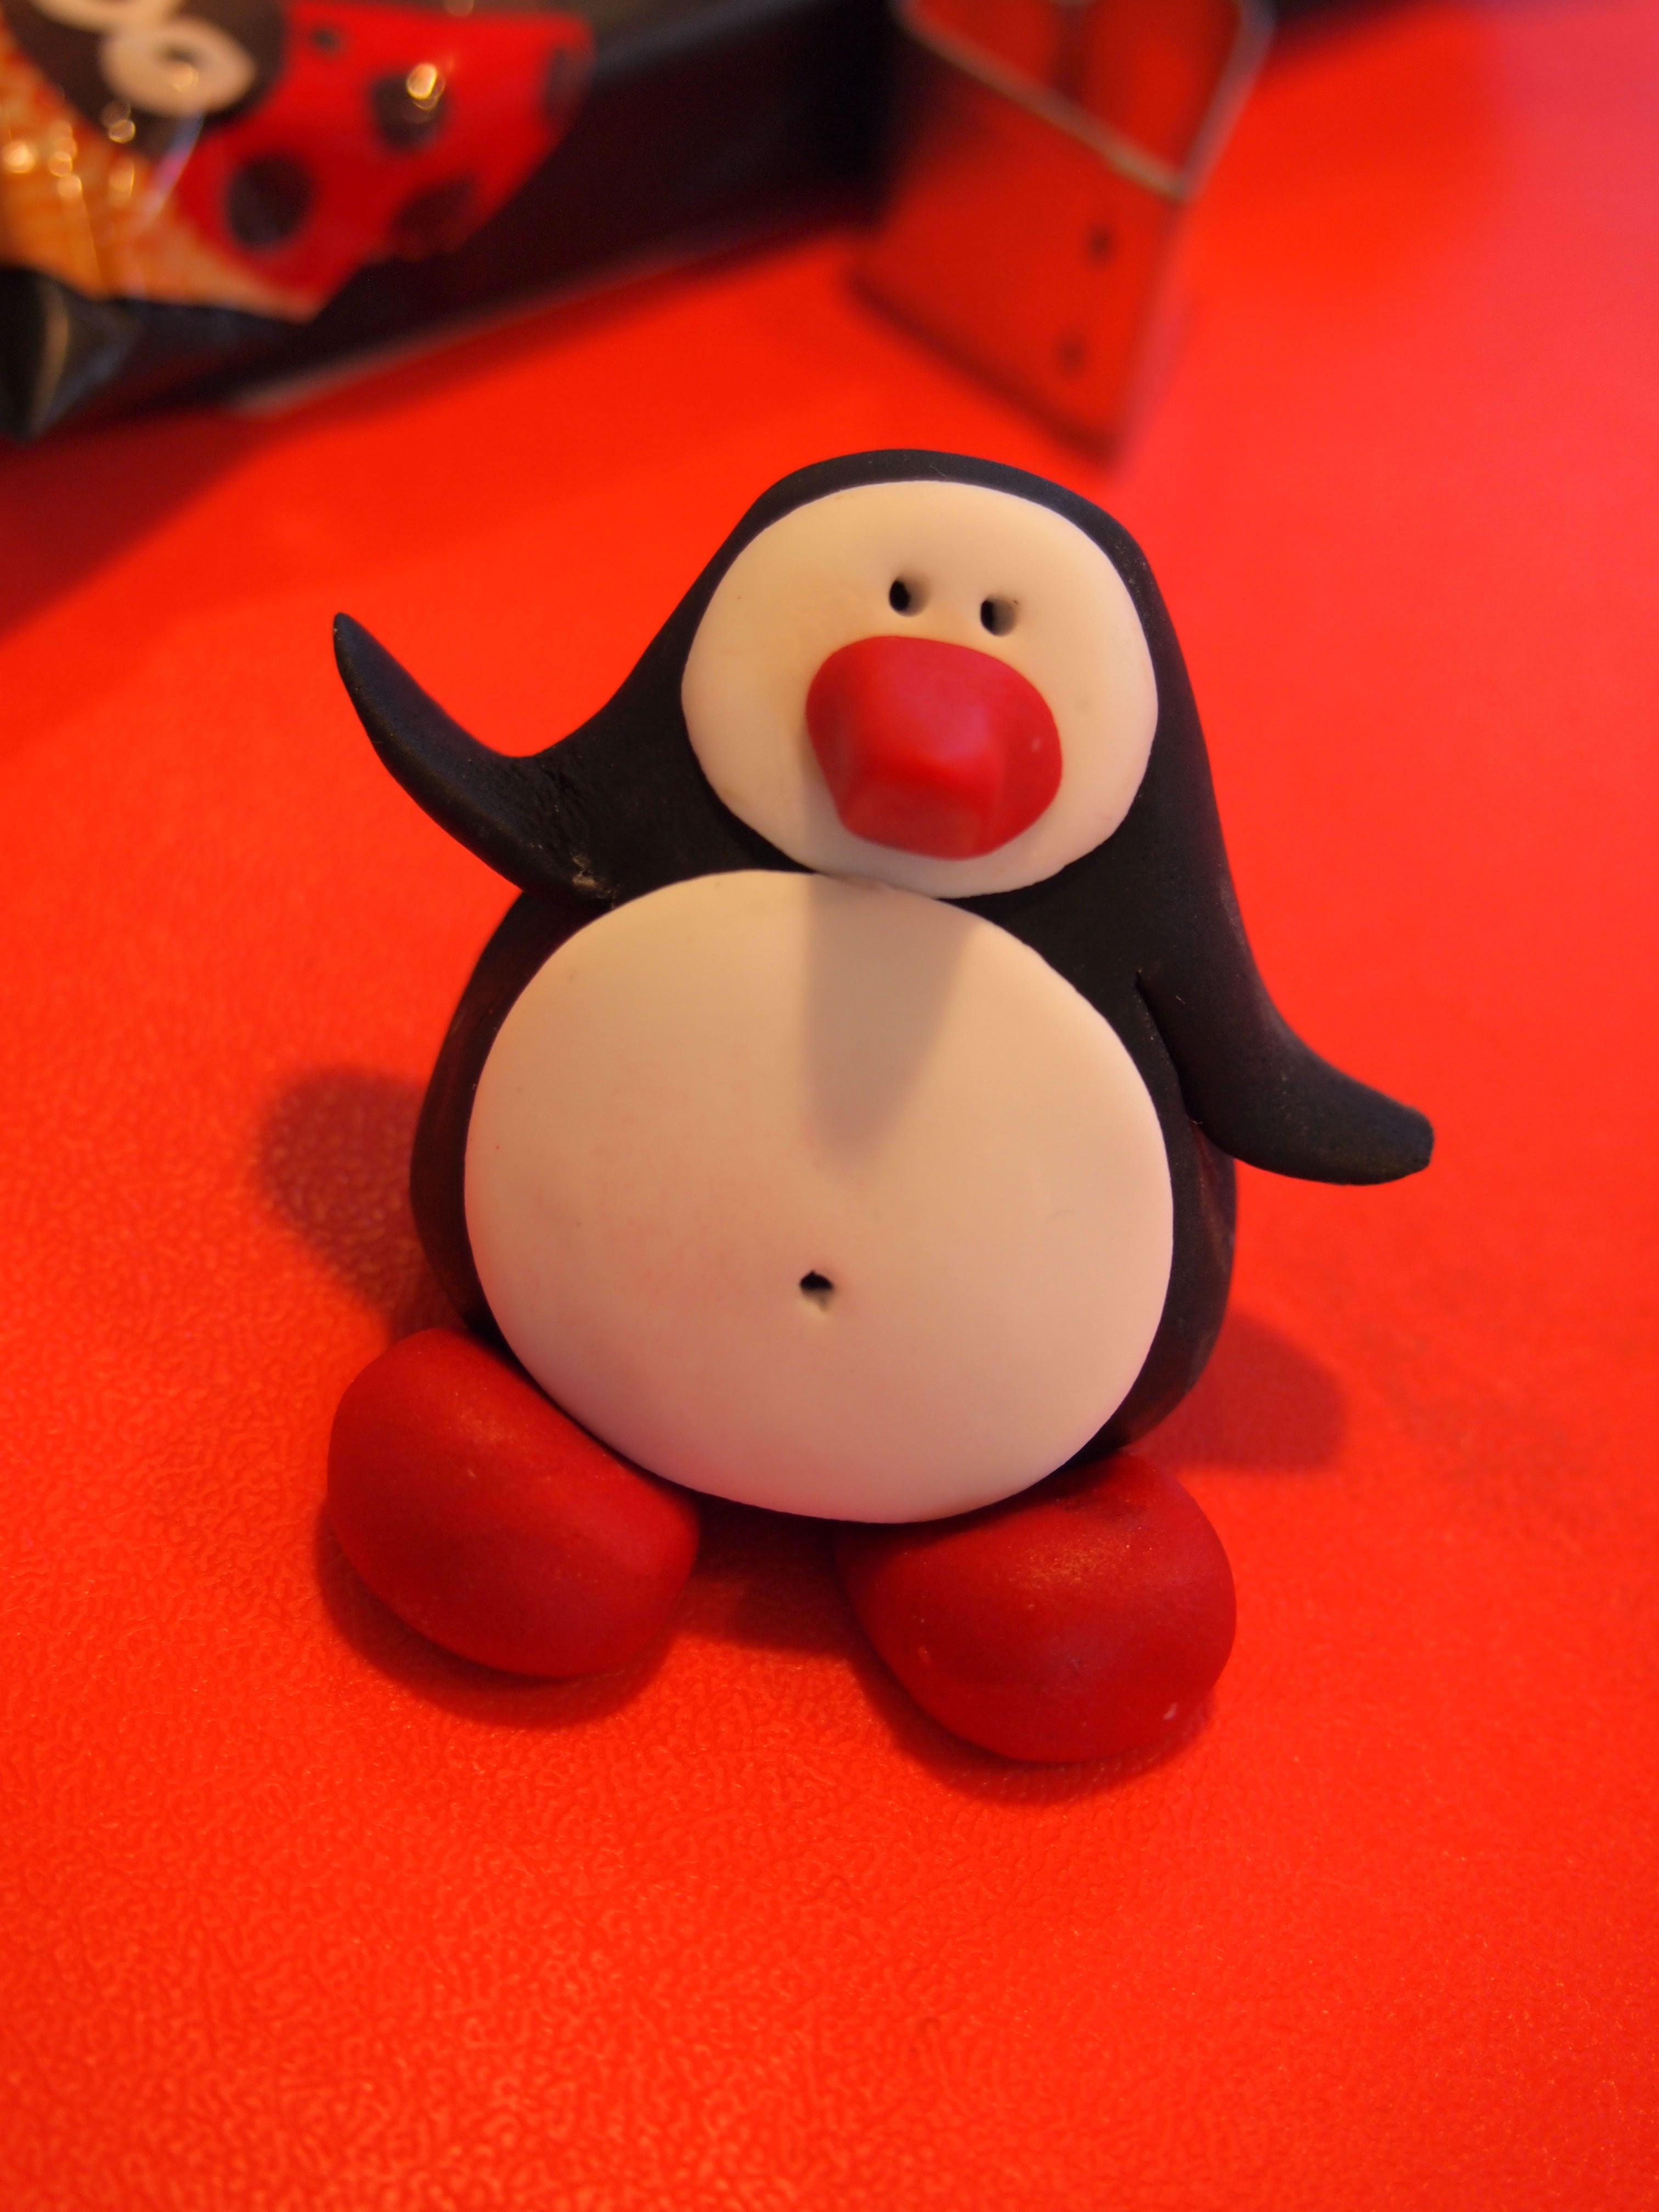
STEP 1
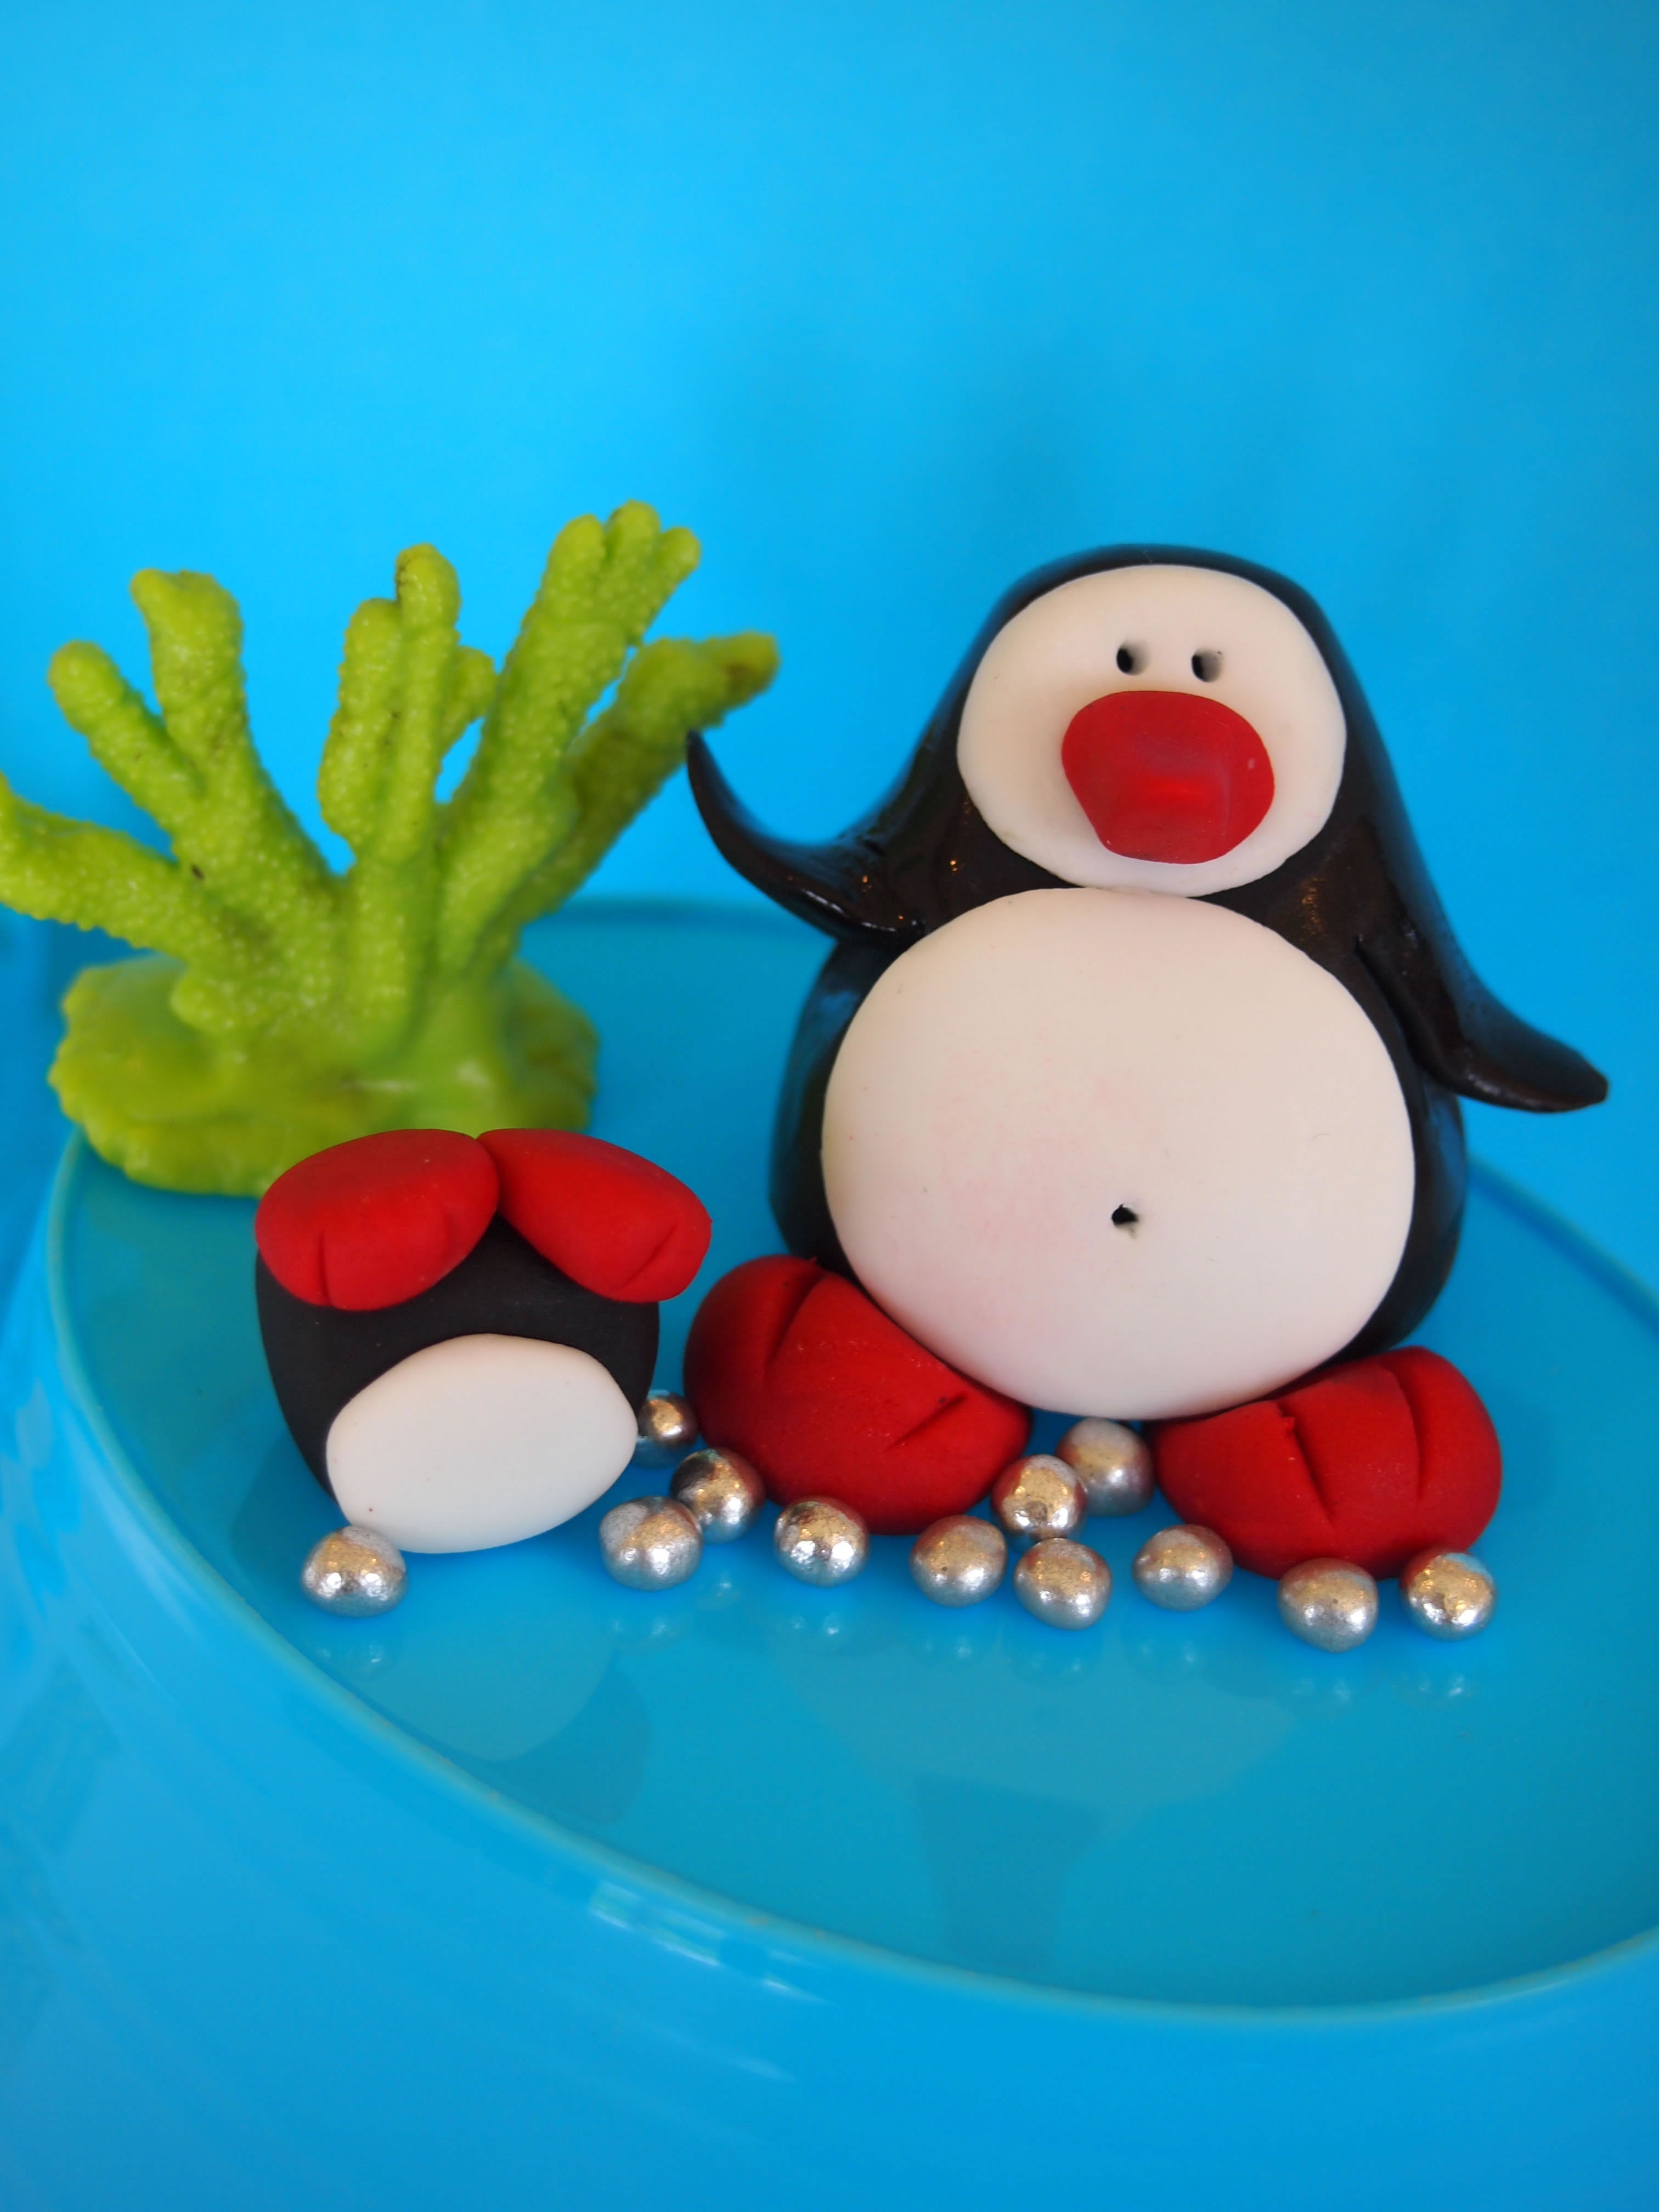
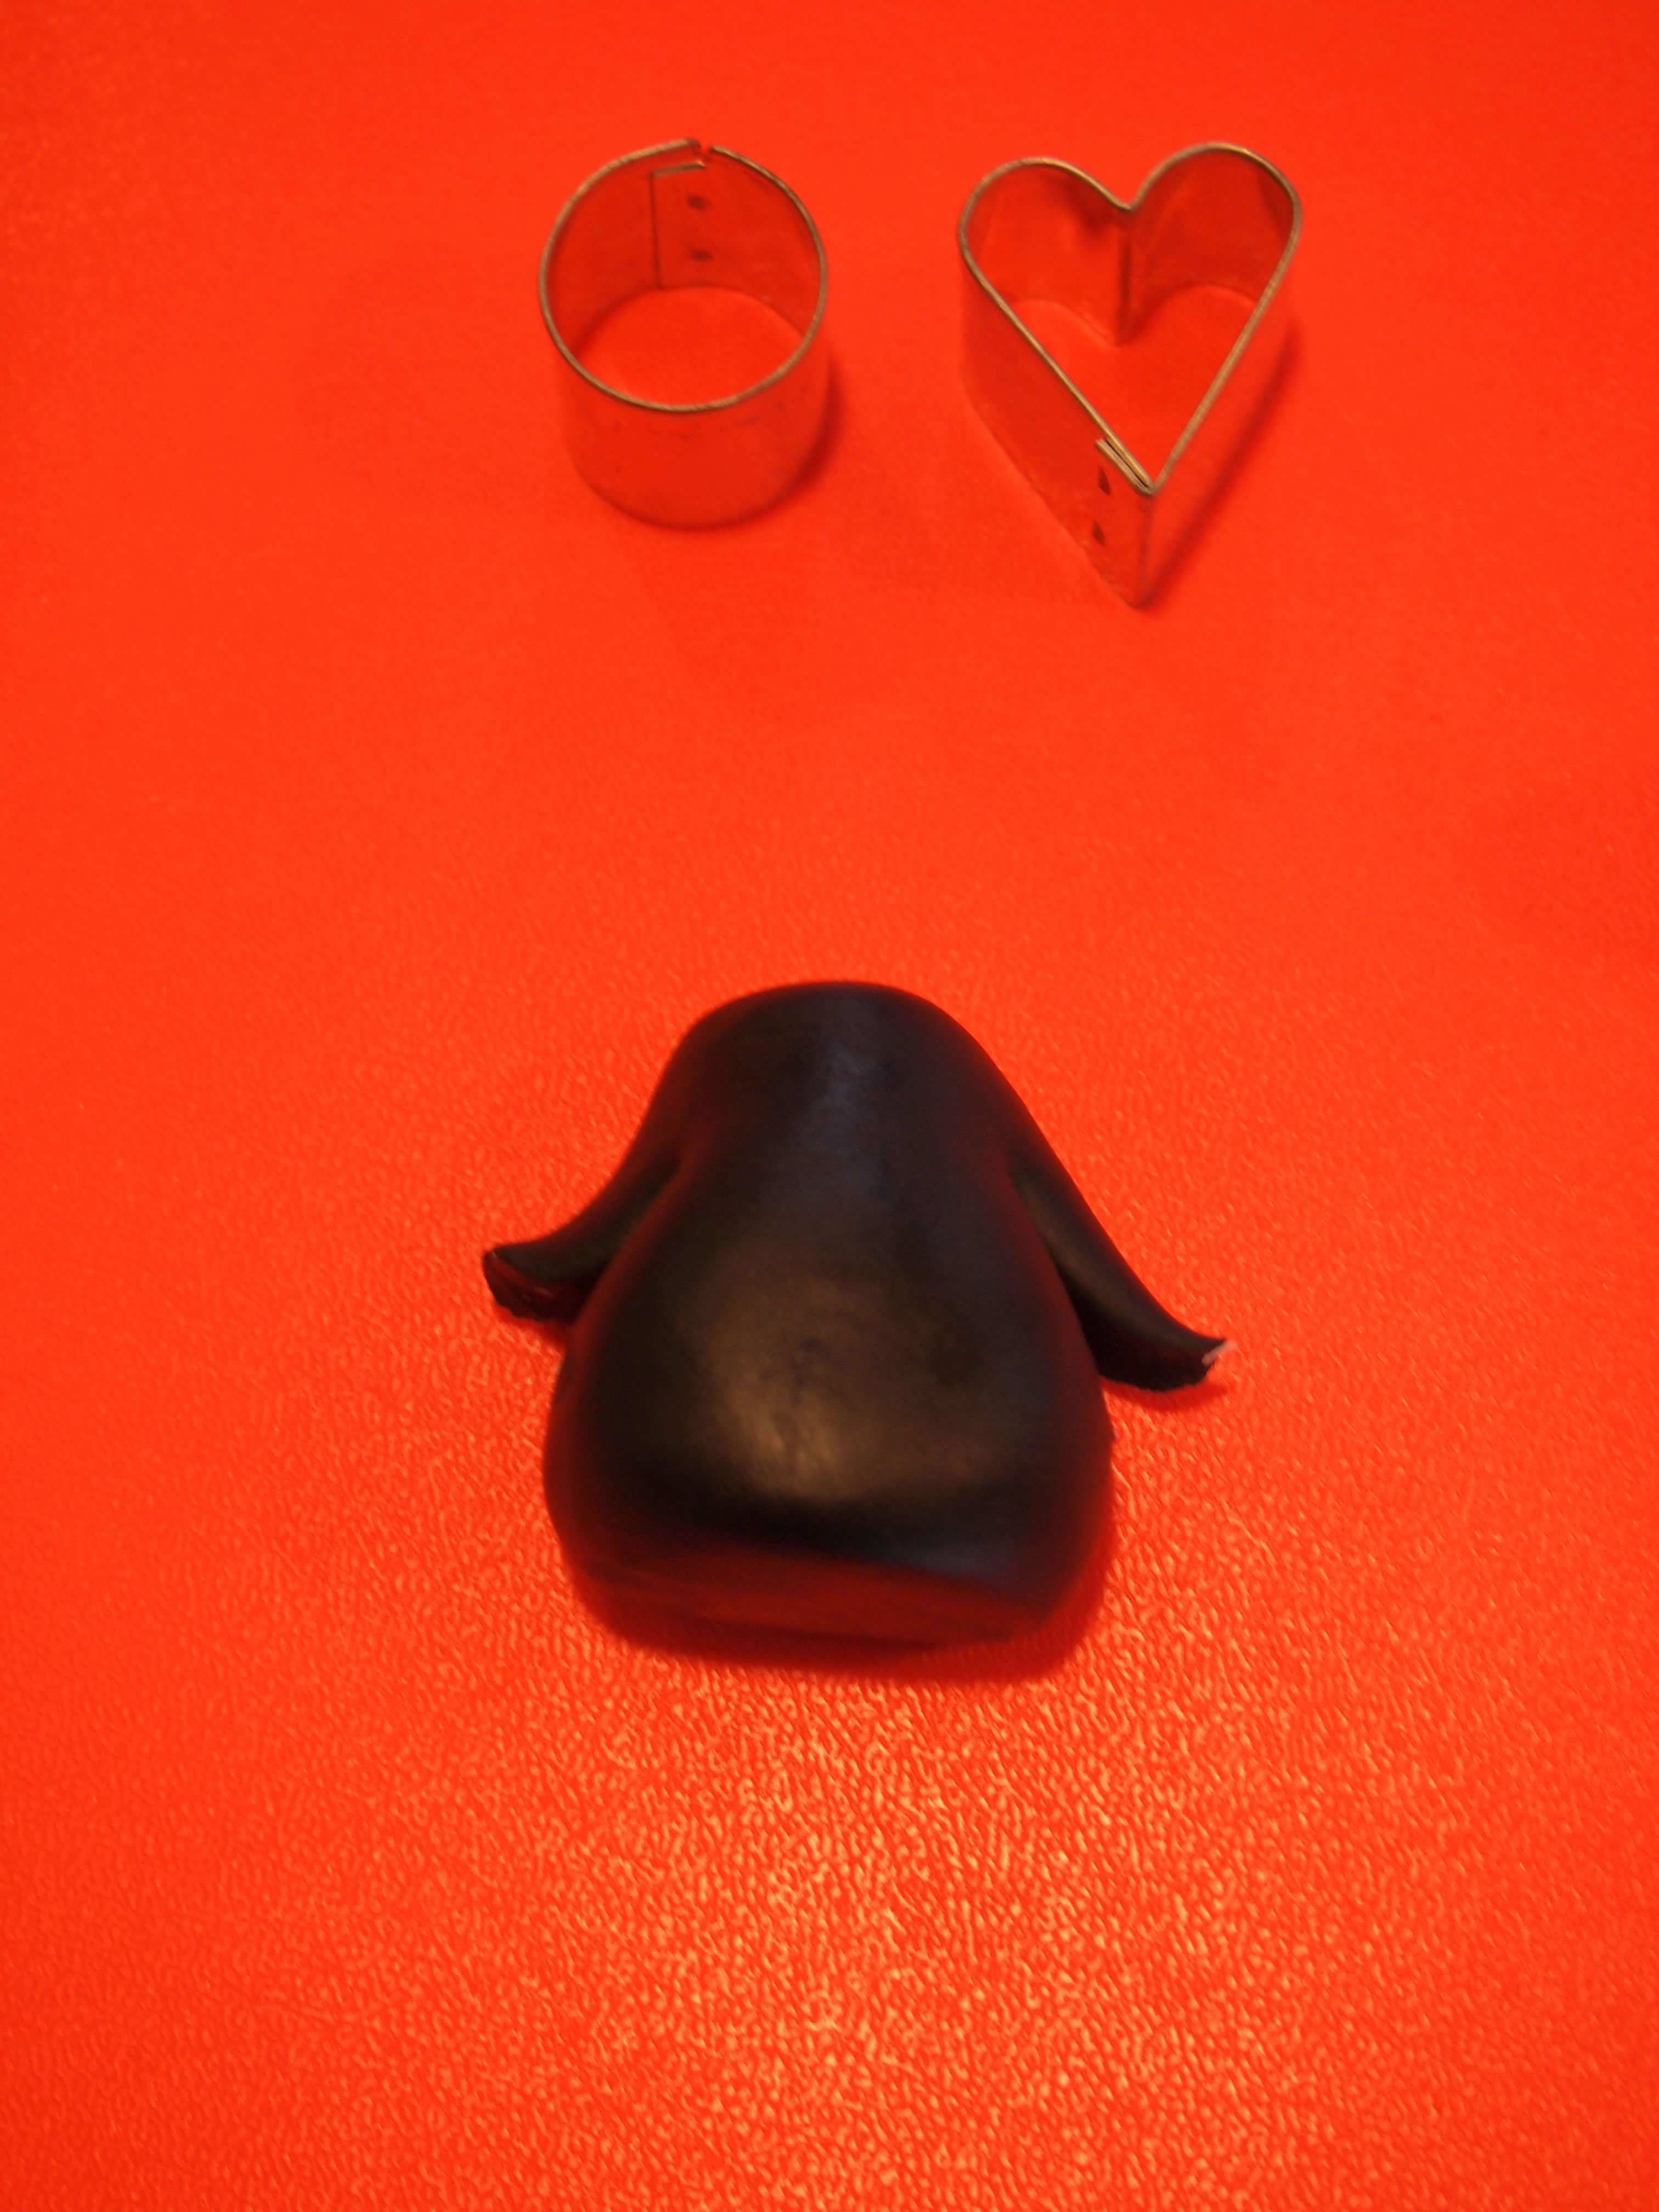
Use 37g of black icing. Create a pear shape. Using a sharp knife gently cut a line into the sides to create arms. Gently smooth edges and shape arms as you’d like them to be. Allow to dry.
STEP 2
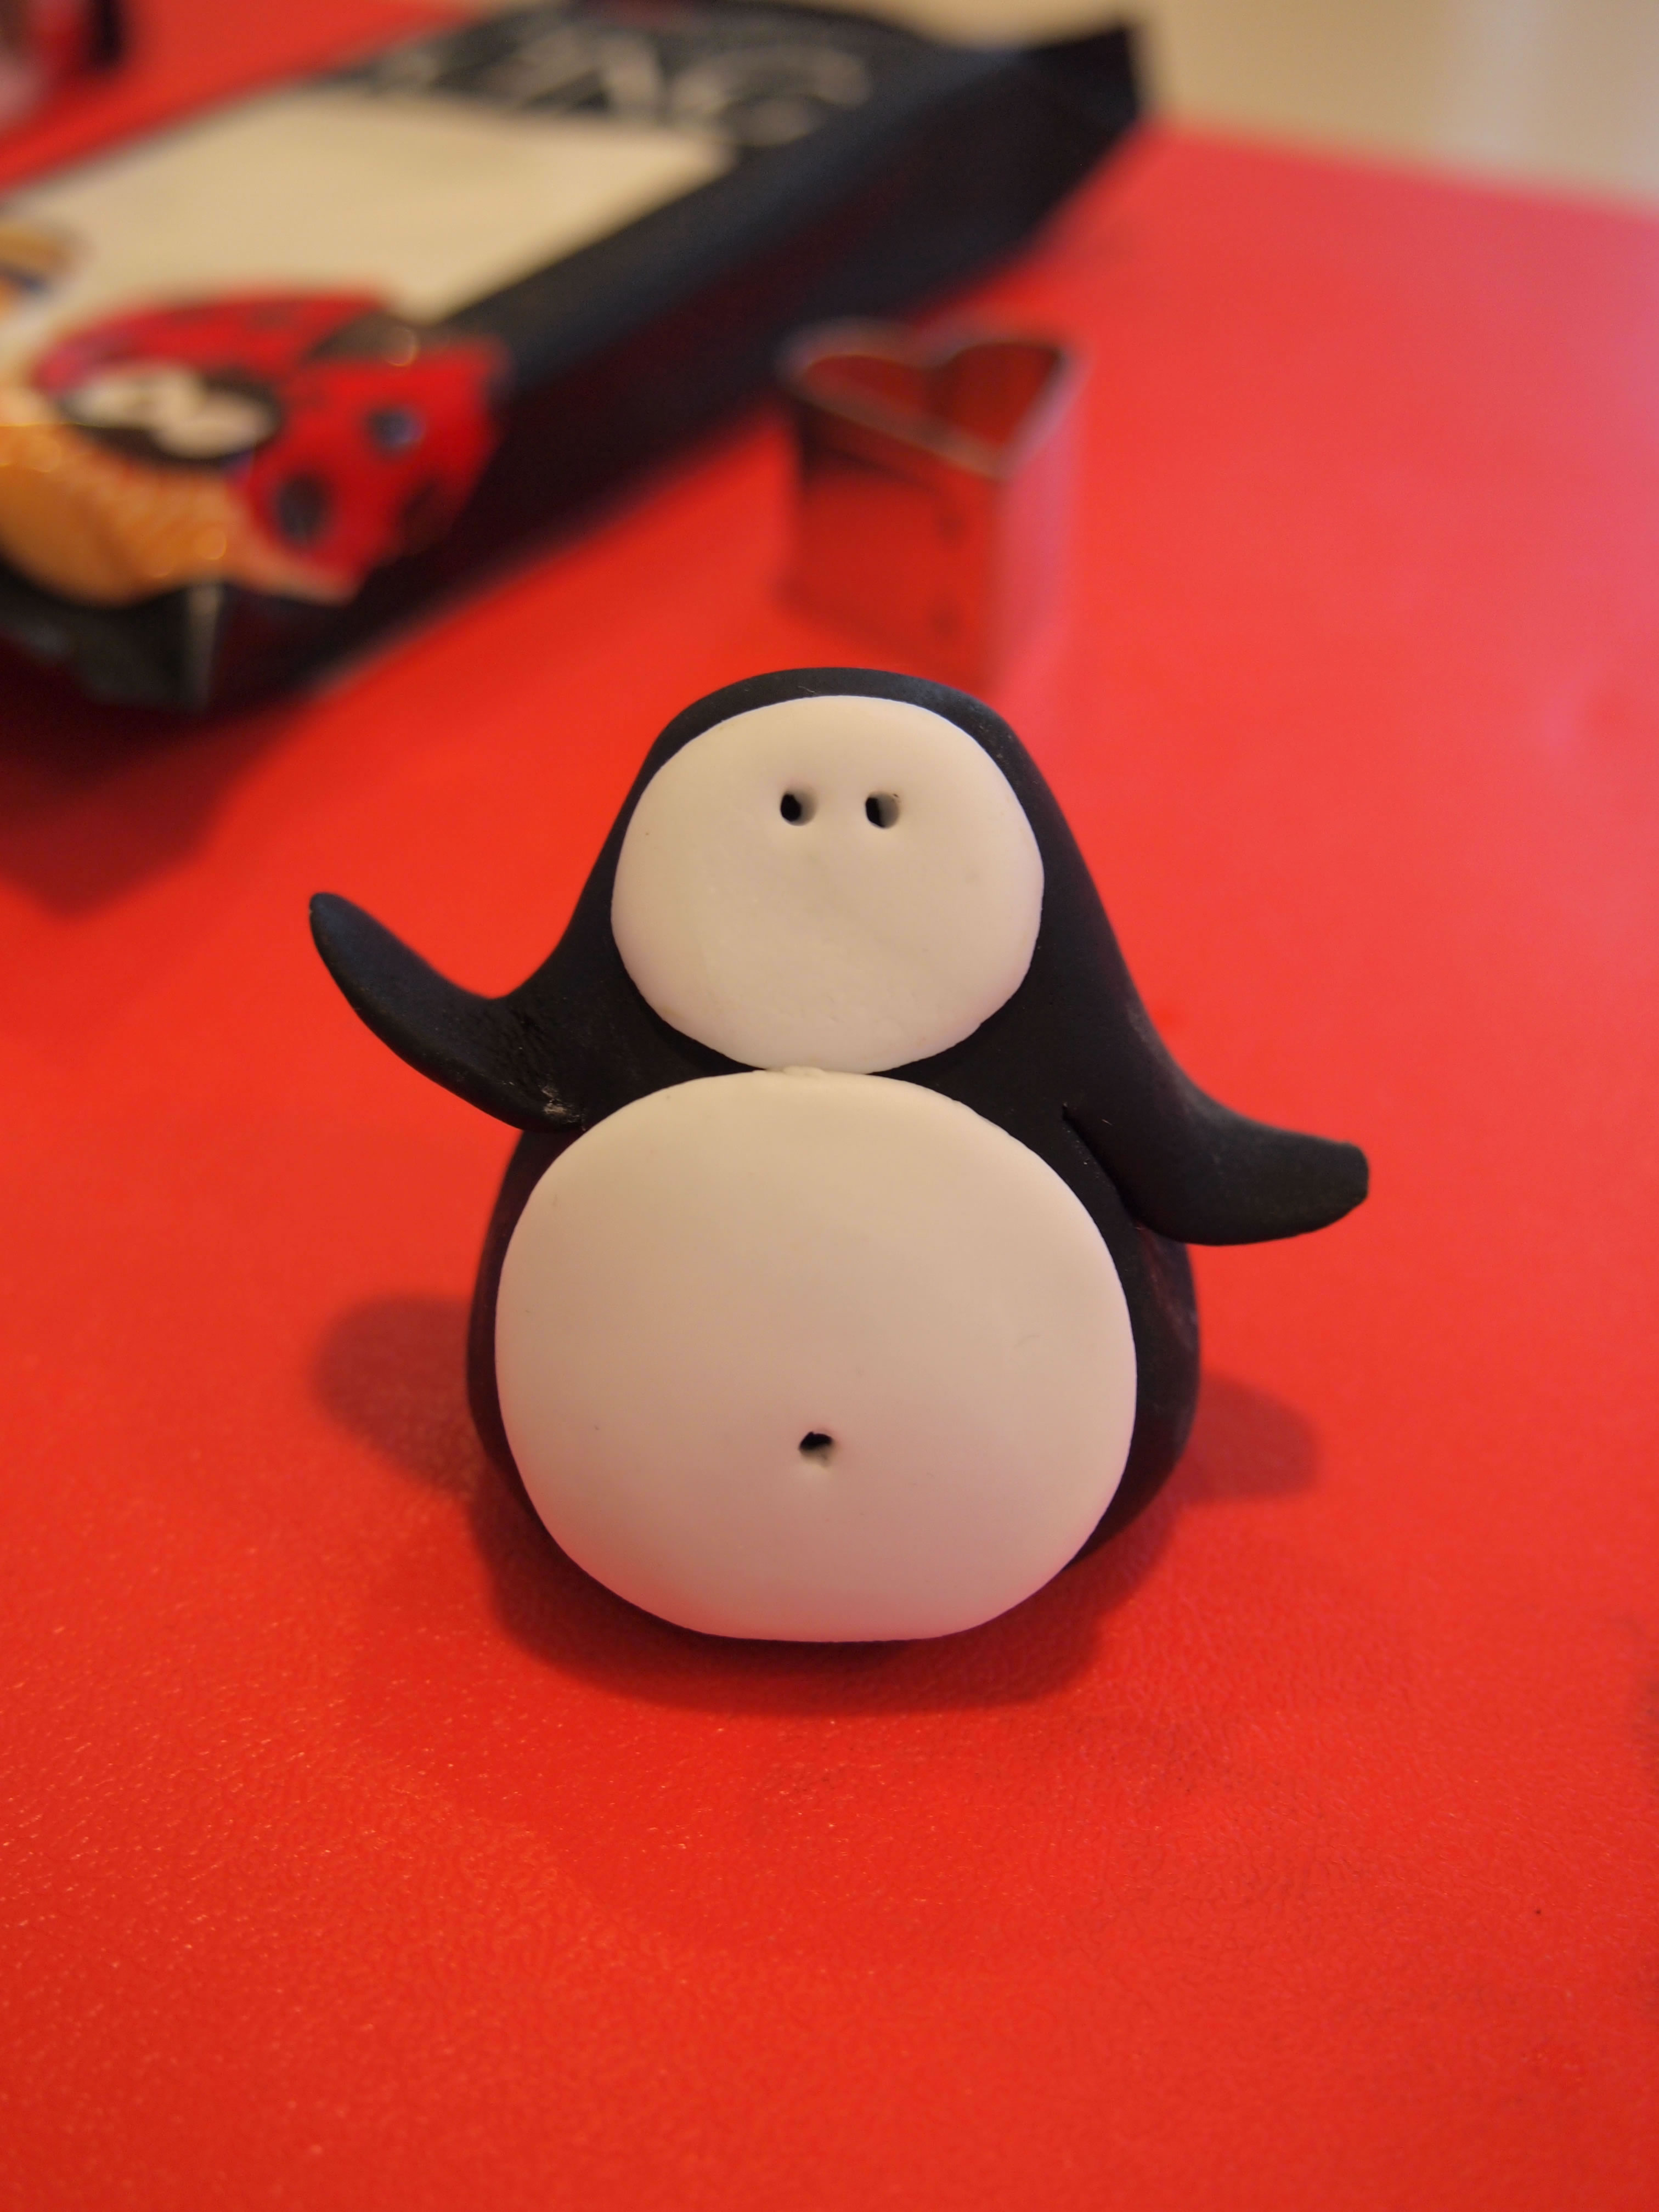
Roll out white icing, use a small round cutter for the face. Glue with a little water.
STEP 3
Roll out more white icing for the body. Use a slightly larger circle for the tummy. Glue with a little water. Use toothpick to make eyes and belly button.
STEP 4
To make a nose, use a little red icing and make a triangle shape. Carefully glue onto the face. If it doesn’t hold, use a little spaghetti (pasta)- break off a little and stick it into the head with a little left poking out then stick the nose onto the spaghetti.
STEP 5
Use approximately 2g of red icing to create his feet. Make two round circles and attach to the body. Use a sharp knife and cut two lines on top. Allow to dry.
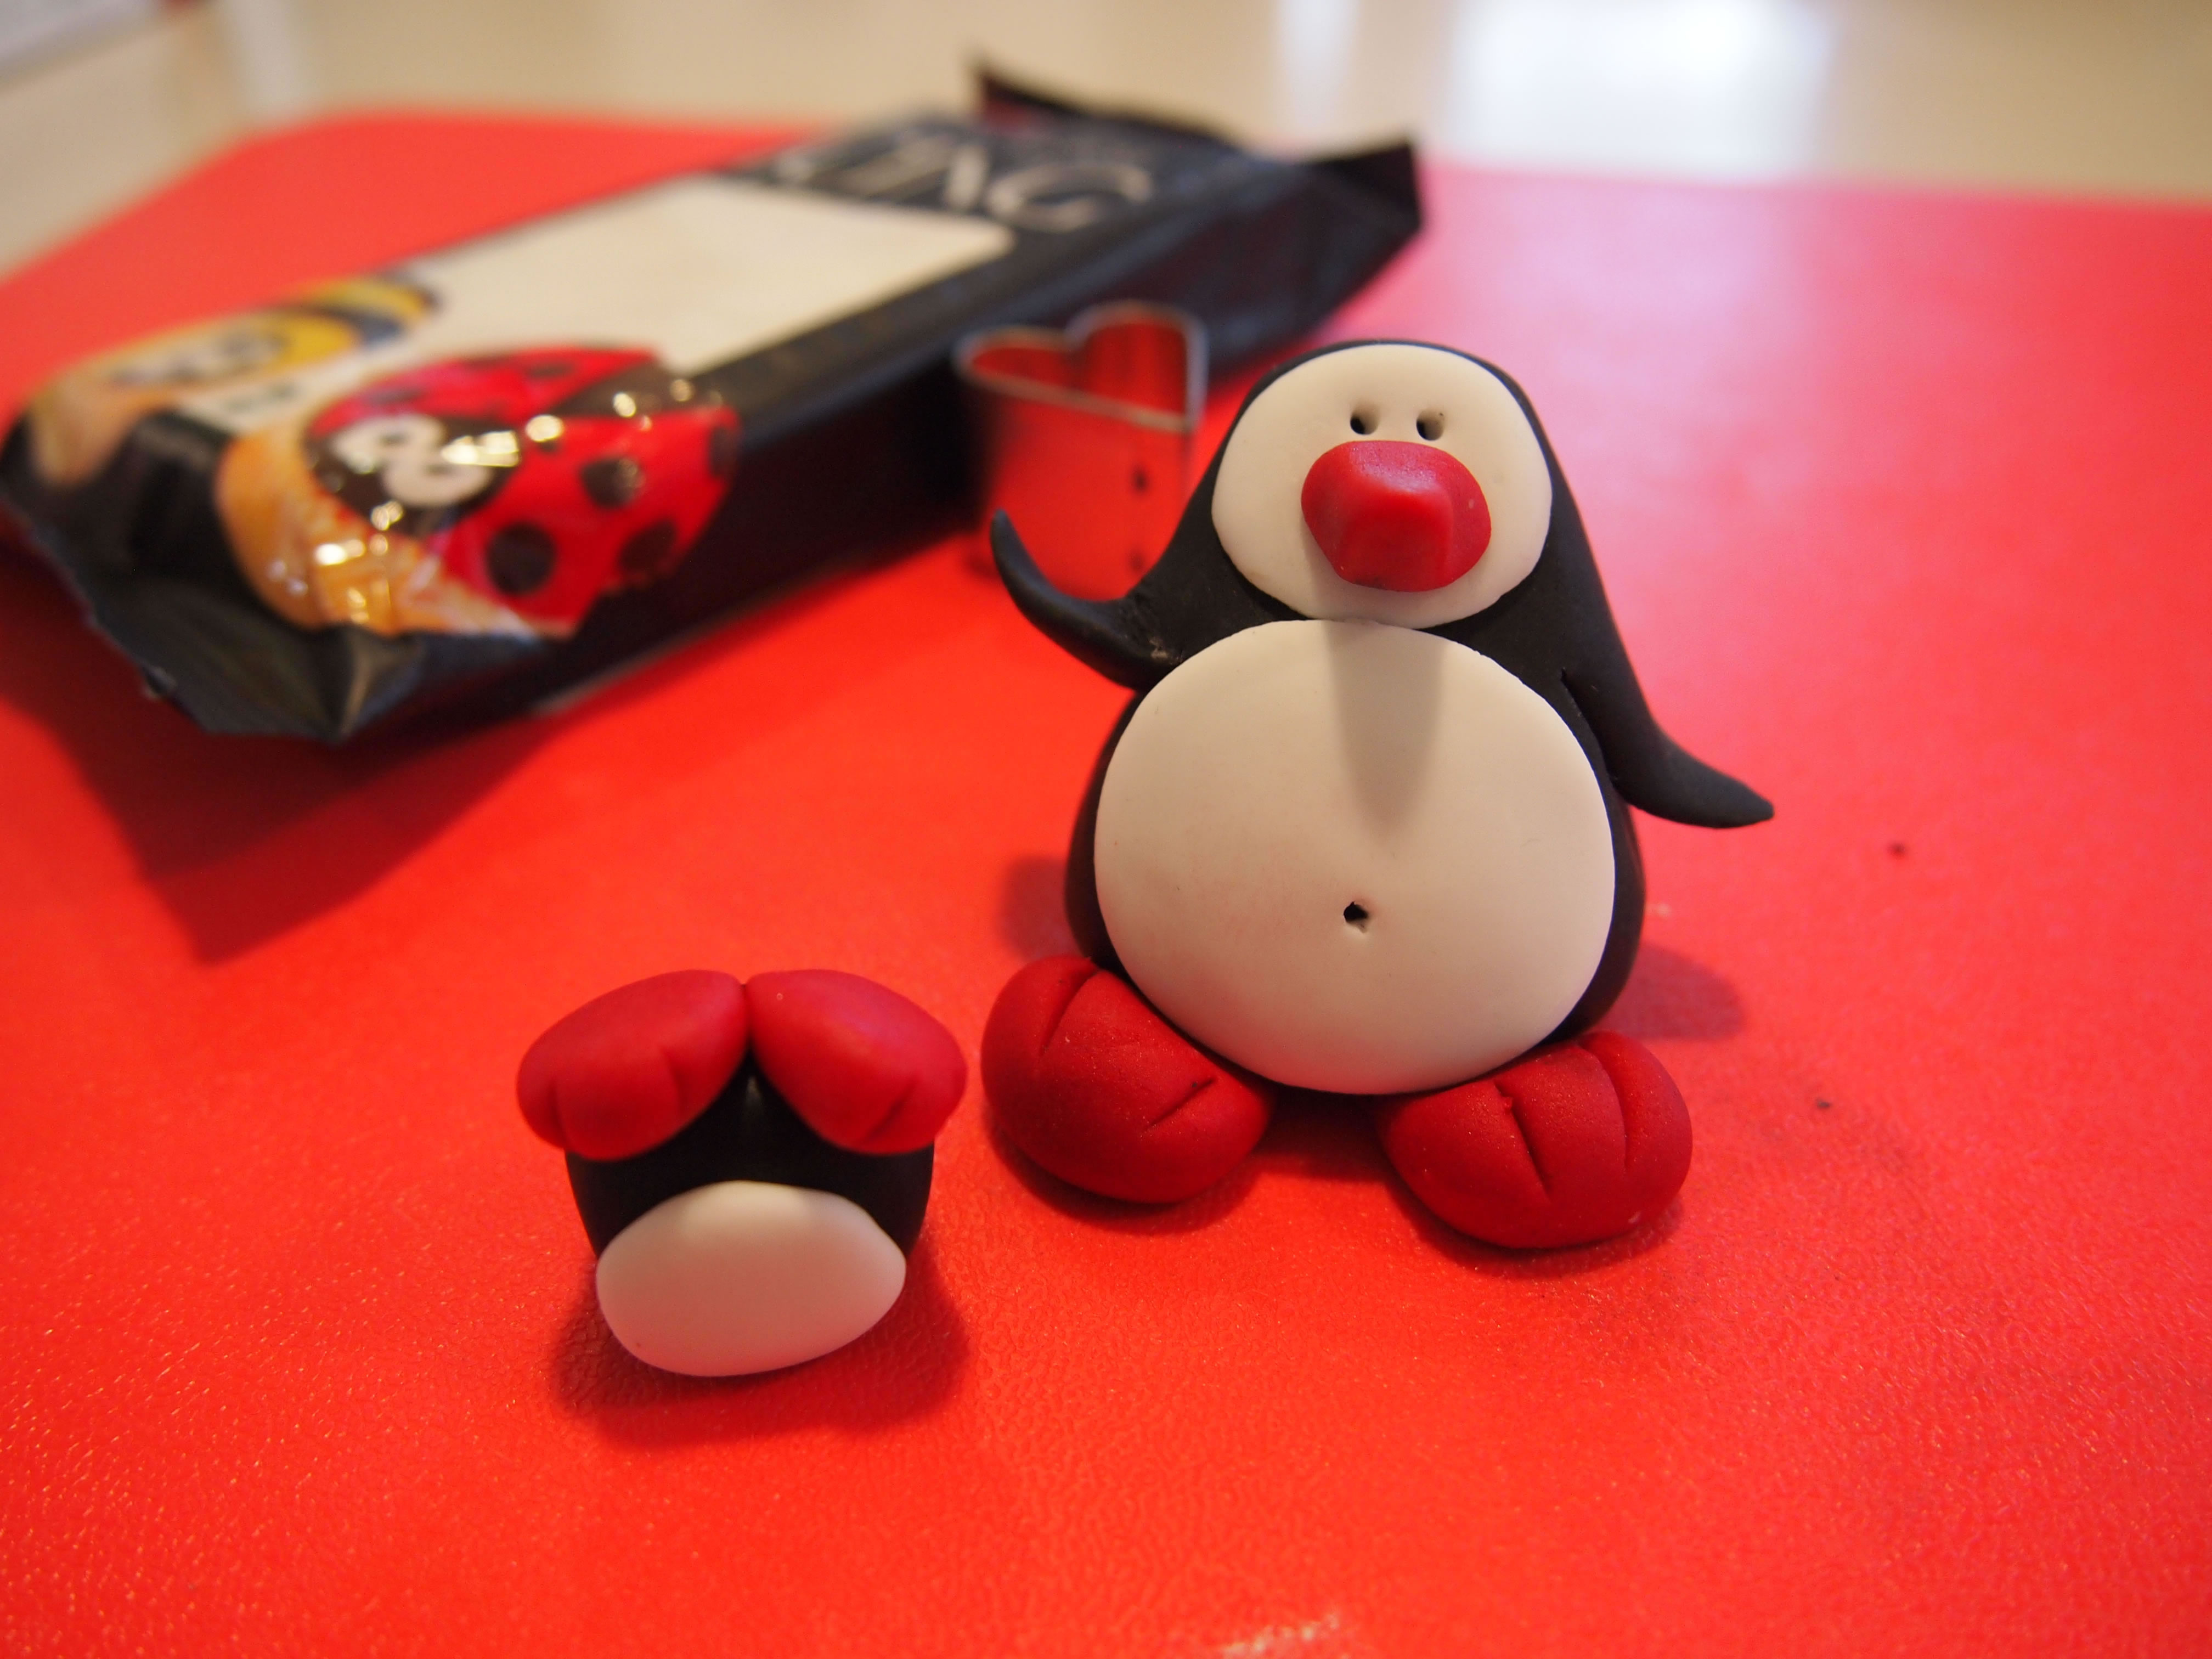
STEP 6
Upside down baby penguin – use a small amount of black icing and make an oval shape. Cut a round circle and glue with a little water onto tummy. Repeat Step 6 for his feet, but use a very small amount of red icing. Carefully glue and allow to dry.
TIP: Be sure to have dry hands when working with fondant. If your hands get sticky, use a little icing sugar. Browse our tips for more hints & tricks for working with fondant.


Comments & Reviews