
Tools & Ingredients
- Piping gel
- Tooth picks
- Non-toxic pencil
- Balling tool
- Paintbrush
- Dr. Oetker Ready To Roll Icing White
- Fondant roller
- 5 inch prepared cake or foam dummy cake
- Cornflour or icing sugar

Method
STEP 1
Cover top of cake with a little sugar syrup or jam for a real cake or with piping gel for a foam dummy cake.
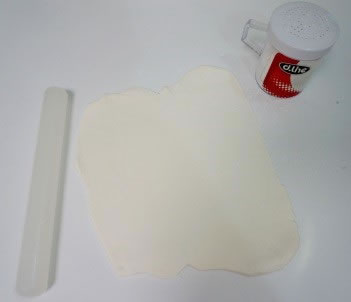
STEP 2
Roll out fondant wide enough to cover just the top part of the cake. Use cornflour or icing sugar to prevent sticking.
STEP 3
Flip the dummy over onto the rolled out fondant and cut around the cake. Discard the excess fondant.

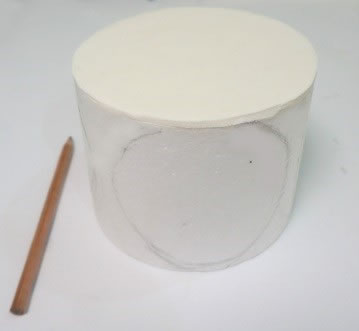
STEP 4
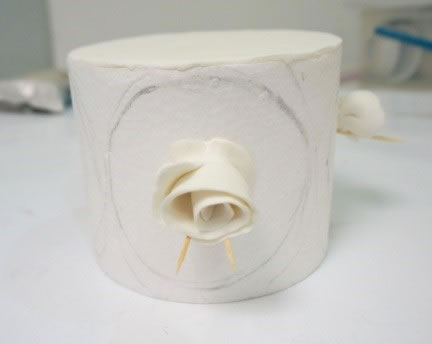
Draw 4 circles around the cake/dummy. Remember to leave a gap between the sides of each circle
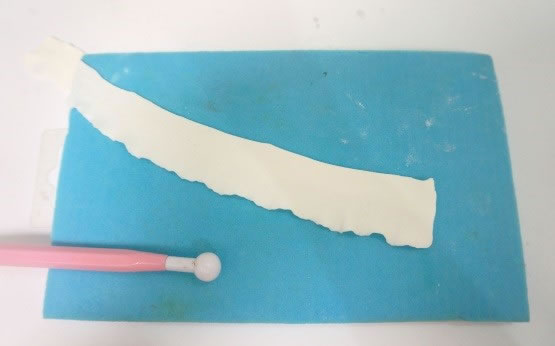
STEP 5
Cut out a fondant strip about 1cm-1.5 wide, 0.5cm centimetre thick and 10 cm long

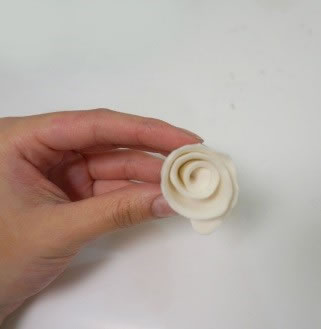
STEP 6
To ruffle — using your balling tool, ball out one side of the strip to create a ruffle effect. Twirl the balled strip into a ribbon rose.
STEP 7
Add piping gel to the cake/foam and stick on the ribbon rose. Use a toothpick to help the ruffles dry in place.
STEP 8
Roll out another fondant strip and continue to work around the cake. Stick only HALF the strip onto the cake by folding it and let the other half form the ruffle.
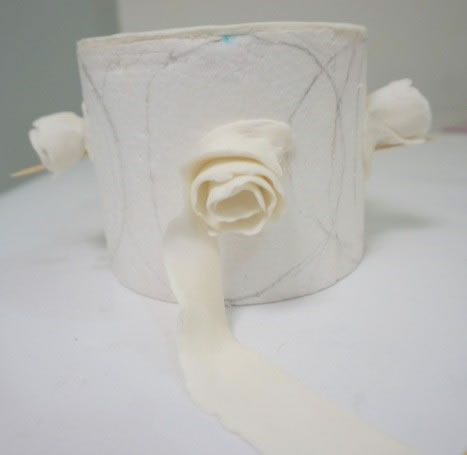
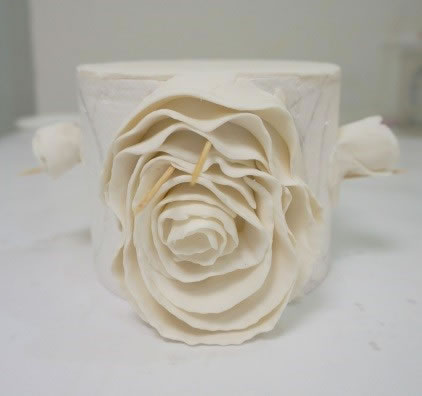
STEP 9
Repeat the process and work your way in around the ruffle circle until you finish at the pencil mark.
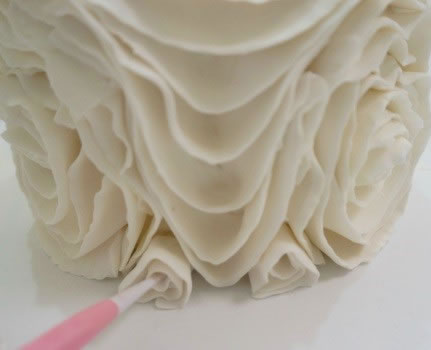
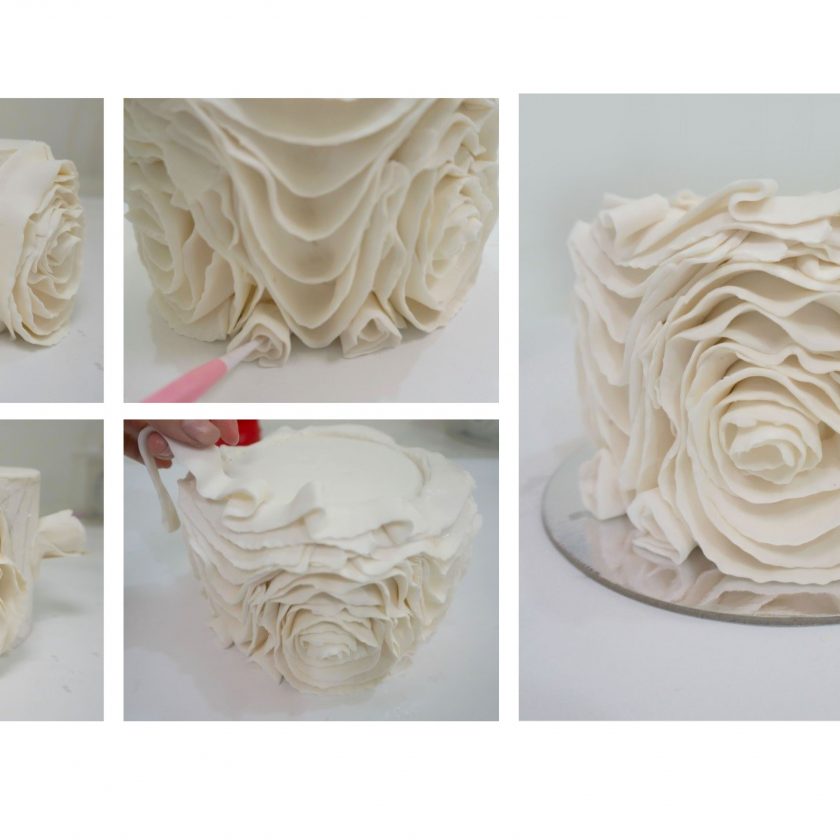
STEP 10
Now start joining the circles by attaching a “ V” shape fondant between the circular ruffles using the same technique as before. As you reach towards the end you will use SHORTER strips.
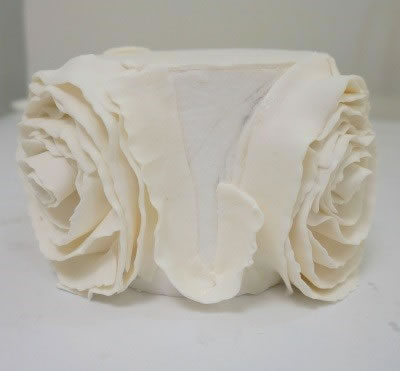
STEP 11
To fill in the gap at the bottom between the “circular ruffle” and “V” cut out a small strip of fondant and roll it around into a triangular shape.
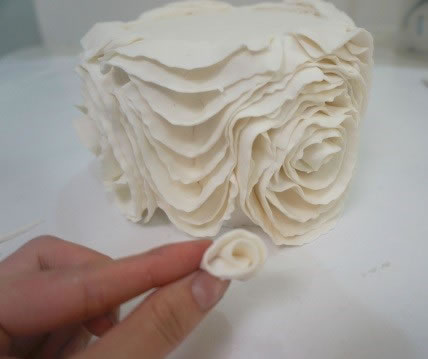
STEP 12
Make sure there is piping gel on the gap area and then use the small end of the balling tool and push the centre of the triangle into the gap
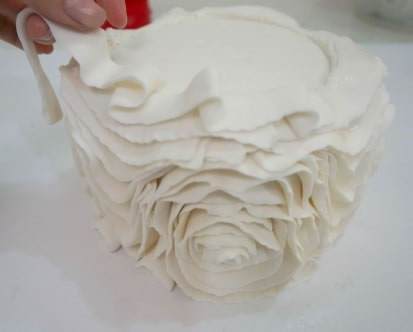
STEP 13
Finish cake with draped strips of fondant around the rim of the top of the cake.
ABOUT STORYTALE CAKES
Storytale Cakes is based in Melbourne and specialises in customised cakes, cupcake and cookie creations. Every cake is made with a lot of effort and detailing to ensure you have that perfect story created, creating a memorable moment for your loved ones. Discover Hannah’s creations on her Instagram or Facebook page.

Comments & Reviews