
Get melting chocolate right and a whole world of good things opens up, silky ganache, chocolate-dipped strawberries, glossy drip cakes, marbled bark and more. The best part is how simple it is. Chocolate really only asks two things of you, that you keep it away from water and never rush it with fierce heat. Melt it slowly in a double boiler or in short microwave bursts, stir as you go, and you’ll finish with a smooth, glossy bowl ready for almost anything. Couverture melts the most beautifully of all, though any good chocolate will happily play along.
None of it is complicated, so let’s get you a glossy bowl and something delicious to make with it.
Start with the right chocolate
The chocolate you choose sets you up for success before any heat is involved. Three types are worth knowing:
- Couverture is the baker’s favourite. It carries more cocoa butter than everyday chocolate, so it melts smoother, flows more freely and sets with a lovely finish. Dark, milk and white couverture all melt well, which makes it a safe choice for anything from glazing to dipping.
- Cooking or eating chocolate melts perfectly well for most jobs. White chocolate is the fussiest of the family and melts a touch thicker, so keep the heat especially gentle when you use it.
- Compound chocolate, often labelled melts or candy melts, is the most forgiving of all and sets firm on its own with no extra steps, trading a little flavour for a lot of convenience.
Whichever you pick, chop it into small, even pieces first. Uniform pieces melt at the same rate, which is the quiet secret to a lump-free bowl.
Two reliable ways to melt it
There are two methods worth mastering, and the one you reach for depends on how much control you want.
- The double boiler, gentle and almost foolproof. Sit a dry heatproof bowl over a saucepan holding a few centimetres of barely simmering water, keeping the base of the bowl clear of the water itself. Add your chopped chocolate, stir now and then, and lift the bowl off the heat once most of it has melted so the last few pieces soften in the residual warmth. Because the water can’t climb above 100°C, the chocolate warms slowly and is very hard to overheat.
- The microwave, quick and easy when you’re patient with it. Use a dry microwave-safe bowl, set the power to medium, and heat in bursts of 20 to 30 seconds, stirring after each one. Stop while a few small lumps remain and let the heat already in the bowl finish them off. Short bursts matter because microwaves heat unevenly, and chocolate holds its shape even when soft, so it can be hotter than it looks.
If neither suits, a low oven at around 50°C will melt chocolate slowly over 10 to 15 minutes with an occasional stir, and a saucepan works at a pinch over the lowest possible heat with constant stirring. The double boiler is still the one we trust most when the result really matters.

Keeping it smooth and glossy
Smooth chocolate stays that way as long as you guard it from its two enemies, water and high heat. Keep your bowl, spoon and any additions completely dry, since even a stray drop of water or a wisp of steam can make the cocoa particles clump and stiffen. And if that ever does happen, don’t tip it out, a splash more warm cream or oil stirred through turns a stiff bowl into a glossy sauce or ganache instead.
Chasing a thinner, glossier finish for dipping strawberries or coating a cake? Stir in a teaspoon or two of a neutral oil like coconut oil, or a little cocoa butter, adding it gradually until the chocolate flows exactly how you like it. A little goes a long way, so build it up slowly.
Turn it into something more
Half the joy of melted chocolate is what you stir into it. A few favourites to build on.
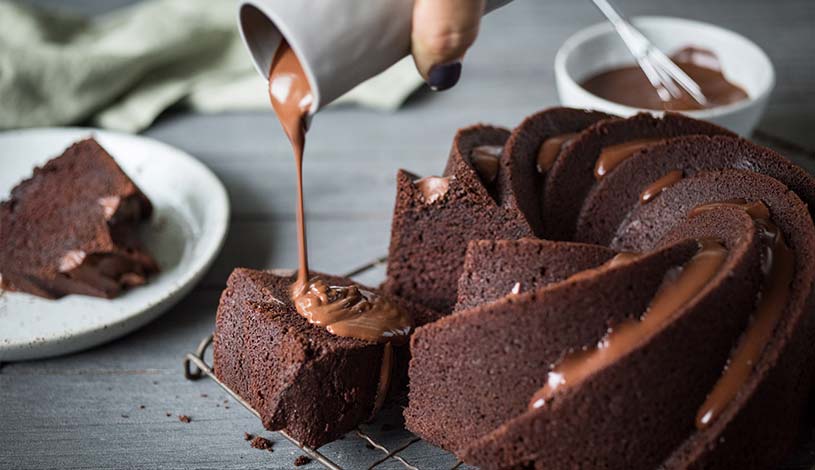
- With cream, you get ganache. Pour warm cream over finely chopped chocolate, rest it for a few minutes, then stir until glossy. More chocolate sets firmer for truffles, more cream keeps it soft for a pourable glaze. A spoonful of glucose syrup is the Queen kitchen’s trick for extra shine and a little insurance against splitting, and a touch of vanilla rounds out the flavour. Read our ganache tutorial for more information on the ratios.
- With butter, you get the base of brownies and mud cakes. Melt the two together gently and stir often so they stay smooth and glossy rather than separating.
- With milk, you get a softer, saucier result. Lovely over puddings and ice cream, though for anything that needs to set firm, cream or a little oil is the better partner.
For a professional snap, temper it
If you want your chocolate to set hard and shiny with a crisp snap, the finish you see on a beautifully dipped strawberry, that comes from tempering rather than plain melting. Tempering simply coaxes the cocoa butter into the right crystal structure so it sets glossy and firm instead of dull or streaky.
The easiest home approach is seeding. Melt most of your chopped couverture gently, take it off the heat, then stir in a little more finely chopped chocolate and let it cool as it melts in. As a guide, dark chocolate wants to settle around 31°C to 32°C, milk around 30°C, and white around 28°C to 29°C, so a kitchen thermometer earns its place here. You’ll know it has worked when a smear on baking paper sets firm and glossy within a few minutes.
Tempering is only worth the effort when the finish is on show, for dipping, moulding and decorations. For baking, sauces and ganache, beautifully melted chocolate is all you need. And compound melts skip the step entirely, since they’re built to set hard on their own.
Now for the fun part
With a smooth, glossy bowl in front of you, the possibilities are the best bit. Whip it into a silky ganache for a cake, tint melted white chocolate for drips and decorations with Queen Food Colour Gels using an oil-based method so it stays glossy (our guide to colouring white chocolate shows you how), swirl it into bark with your favourite toppings, or dip a whole tray of strawberries and take the credit. Keep it dry, keep it gentle, and melted chocolate quickly becomes one of the most useful skills in your kitchen.

Frequently asked questions
What’s the best chocolate for melting?
Couverture is the top pick because its higher cocoa butter content melts smoother and more fluid, which makes it ideal for glazing, dipping and coating. Dark, milk and white couverture all melt well. Everyday cooking chocolate and compound melts work too, with compound the most forgiving.
How do you melt chocolate in the microwave?
Chop it finely into a dry microwave-safe bowl, set the microwave to medium power, and heat in 20 to 30 second bursts, stirring between each one. Stop while a few lumps remain and stir them out with the residual heat, since chocolate scorches easily on full power.
Why does chocolate seize, and can you fix it?
Chocolate seizes when a little water or steam gets in and makes the cocoa particles clump into a stiff, grainy mass. Keep everything bone dry to prevent it. If it does seize, stir in a little warm cream or oil to loosen it back into a smooth sauce or ganache.
Why did my chocolate burn or turn grainy?
Almost always because it was heated too fast or too hot, most often in the microwave on full power. Chocolate scorches at a low temperature and can’t be rescued once bitter, so melt it slowly over gentle heat and stir often to keep it even and smooth.
Can you melt chocolate with cream?
Yes, and that combination is ganache. Pour warm cream over finely chopped chocolate, let it sit for a few minutes, then stir until silky and glossy. Adjust the ratio to suit the job, more chocolate for firm truffles, more cream for a soft, pourable glaze.
Can you melt chocolate and butter together?
Yes, and it’s completely standard in baking, from brownies to mud cakes. Melt the two gently together in a double boiler or in short microwave bursts, stirring often so the mixture stays smooth and glossy rather than splitting or turning oily.
Do you need to temper melted chocolate?
Only when you want a glossy finish and a firm, crisp snap, such as for dipping, moulding or decorations. For baking, sauces and ganache, plainly melted chocolate is perfect. Compound chocolate and candy melts never need tempering, as they set hard on their own.
How do you make melted chocolate thinner?
Stir in a teaspoon or two of a neutral oil such as coconut oil, or a little cocoa butter, adding it gradually until it flows the way you want. This is especially handy for a smooth, even coating when you’re dipping fruit or covering a cake.
Can you colour melted chocolate?
Yes, but use an oil-based method rather than ordinary water-based colour, which would make it seize. Concentrated food colour gels blended with a little oil work beautifully, especially with white chocolate, which takes colour best and is ideal for decorations and drips.


Comments & Reviews